
Tutorial 6: Arranging and
Editing Your Music
You build your projects by arranging regions in the
timeline and editing them in the editor.
After you’ve added some loops and recordings to your project, you can move, copy,
and make other changes to the regions in the timeline to build an arrangement of the
project. You can arrange regions in the timeline by cutting, copying, and pasting them;
by moving, resizing, and looping them; and by splitting and joining them. You can
define sections of a project using arrange regions, then use them to quickly rearrange
the project. You can also edit regions in the editor in a variety of ways.
In this tutorial, you’ll learn how to:
 Select a single region or multiple regions
 Copy and paste regions
 Loop, resize, and move regions
 Split and join regions
 Use the arrange track to define different sections and rearrange a project
 Rename regions
 Transpose regions
 Enhance the timing of regions
 Play regions in the editor
 Speed regions up or slow them down
 Enhance the tuning of Real Instrument regions
 Set Real Instrument regions to keep their original tempo
 Use the timeline grid to snap regions to measures, beats, and other units of time
 Import audio and MIDI files

82
Chapter 8
Tutorial 6: Arranging and Editing Your Music
Arranging Basics
Each time you record music in a track, you create a region in the instrument’s track
containing the music you record. When you drag a loop to the timeline, you create a
region from the loop. Any changes you make to the region, such as splitting or
transposing it, do not change the original recording or loop.
Each type of region appears as a different color in the timeline:
 Purple–Real Instrument regions from your recordings
 Blue–Real Instrument regions created from loops
 Orange–Regions from imported audio files
 Green–Software Instrument regions from recordings and from loops
Regions are the building blocks of a project. You create the flow and build the form of a
project by arranging regions in the timeline. Ways you can work with regions in the
timeline include copying and pasting, moving and resizing, looping, transposing, and
splitting and joining them. In most cases, you can edit different types of regions in
exactly the same way. In a few situations you must edit them differently; these
exceptions are explained in the following sections.
Selecting Regions
To make changes to a region, you first select it in the timeline.
To select a region:
 Select a single region by clicking it.
To select multiple regions, do one of the following:
 Shift-click the regions.
 Drag from a point before the first region to a point after the last region to select all
the regions in between.
The selected regions appear highlighted in the timeline.
Note: To select regions and perform other actions such as looping and resizing, you
may need to zoom in on the region so that it is large enough to select.
You can cut, copy, and paste regions using the standard Mac OS menu commands and
keyboard shortcuts.
To cut a region:
 Select the region, then choose Edit > Cut.
To copy a region, do one of the following:
 Select the region, then choose Edit > Copy.
 Option-drag the region.

Chapter 8
Tutorial 6: Arranging and Editing Your Music
83
To paste a region:
 Move the playhead to the point in the timeline where you want the region to start,
then choose Edit > Paste.
When you paste a region, the playhead moves to the end of the pasted region. You can
paste additional copies of the region, and each one starts at the point in the timeline
where the previous one ends.
Moving Regions
You can move a region by dragging it to a new point in the timeline. You can also
move a region to another track of the same type as the region. (Real Instrument
regions can be moved only to Real Instrument tracks, and Software Instrument regions
can be moved only to Software Instrument tracks.)
To move a region:
 Drag the region left or right to a new point in the timeline.
 Drag the region up or down to another track of the same type.
As you move a region, alignment guides appear showing you when the left or right
edge of the region is aligned with other objects in the timeline. If you don’t want to use
alignment guides, you can turn them off in the General pane of GarageBand
preferences.
You can also move regions left to fill the space of a deleted region.
To delete a region and move the following regions left:
1
Select the region you want to delete.
2
Choose Edit > “Delete and Move.”
All following regions on the same track move left by the length of the deleted region.
Two regions cannot overlap in the same track. If you drag a region over part of another
region, the region being covered is shortened to the edge of the overlapping region. If
one region completely covers another region, the region being covered is deleted from
the track.
Try adding a new drum or bass loop to the timeline, and then loop it to create a new
rhythmic groove.
84
Chapter 8
Tutorial 6: Arranging and Editing Your Music
Resizing Regions
You can resize regions by either shortening or lengthening them. You can shorten both
Real Instrument and Software Instrument regions so that only the visible part of the
region plays. You can lengthen Software Instrument regions (but not Real Instrument
regions) to add silence to the beginning or end of the region.
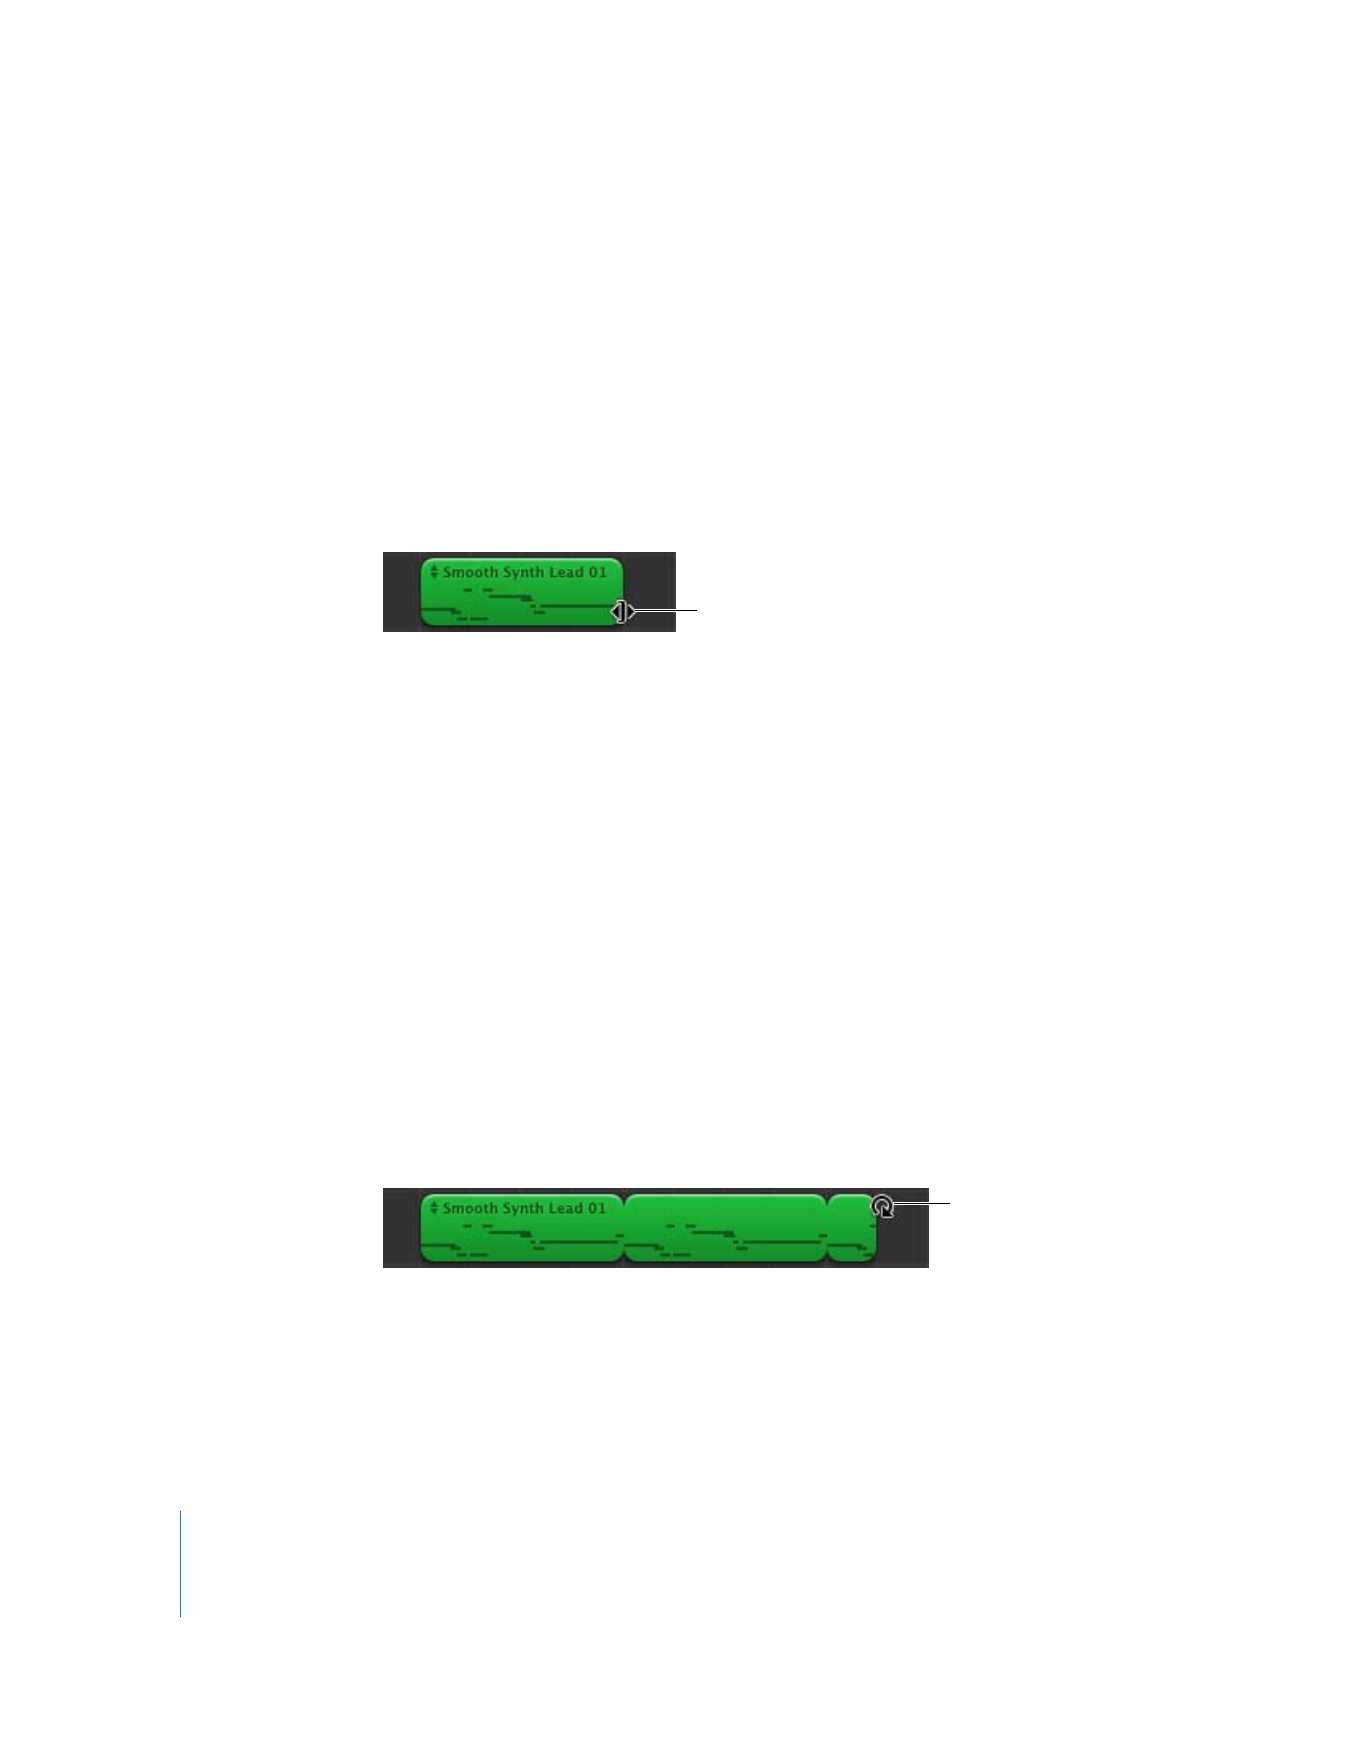
To resize a region:
1
Move the pointer over the lower half of either edge of the region. The pointer changes
to a resize pointer, with an arrow pointing away from the region.
2
Drag the edge of the region to shorten it or lengthen it.
Resizing a region by lengthening adds silence to the region. This can be useful if you
want to make copies of the region, each lasting for a certain number of beats.
Note: You can’t resize a Real Instrument region beyond its original length. Also, you can
only resize a Real Instrument region containing multiple-take recordings from the right
edge, not the left. You can lengthen a Software Instrument region with multiple-take
recordings to the left, but not shorten it.
Looping Regions
You can loop a region so that it repeats over time. When you loop a region, it plays for
as much time as you extend it in the timeline.
To loop a region:
1
Move the pointer over the upper half of the right edge of the region. The pointer
changes to a loop pointer, with a circular arrow.
2
Drag the right edge of the region to the point where you want it to stop playing. When
you play the project, the region will loop repeatedly to this point.
When you loop a region, the notches at the top and bottom of the region show the
beginning and end of each repetition. You can drag to the end of a repetition or to
anywhere in the duration of the loop.
Resize pointer
Loop pointer

Chapter 8
Tutorial 6: Arranging and Editing Your Music
85
Try looping the drum and bass regions you added to the timeline. Rhythm patterns in
most popular music last for some multiple of four measures. For example, the verses
and choruses of many popular songs often last for 16 or 32 measures each.
Splitting and Joining Regions
You can split a region in the timeline. Splitting a region lets you start playing the
region from a point other than the beginning, or use parts of a region in different
places in the timeline.
1
Select the region you want to split.
2
Move the playhead over the point in the region where you want to split it.
3
Choose Edit > Split.
The selected region is split into two regions at the playhead. Only the selected region is
split, even if regions in other tracks are under the playhead as well. If multiple regions
are selected and are under the playhead, they will all be split. When you split a
Software Instrument region, any notes at the split point are shortened to that point.
You can join multiple regions into a single region. To be joined, the regions must be
adjacent to each other on the same track, with no space between them.
To join regions:
1
Make sure the regions are the same type, on the same track, and adjacent to each
other.
2
Select the regions you want to join.
3
Choose Edit > Join.
When you join Real Instrument regions, a dialog appears asking if you want to create a
new audio file. Click Create to join the regions in a new Real Instrument region.
Real Instrument regions from your recordings (purple) can be joined only to Real
Instrument regions, and Software Instrument regions (green) can be joined only to
Software Instrument regions. Real Instrument regions from loops (blue) can't be joined.
Quickly Rearranging a Project
The GarageBand timeline includes an arrange track. You can add arrange regions to the
arrange track to define different sections of a project, such as the intro, verse, and
chorus. You can also move and copy arrange regions to easily rearrange the sections of
your project.
When you move or copy an arrange region, the music in all tracks in that section of the
project is moved or copied. If any automation curves are active in that section of the
project, including the master track, their control points are moved or copied as well.
86
Chapter 8
Tutorial 6: Arranging and Editing Your Music
To show the arrange track:
m
Choose Track > Show Arrange Track (or press Command-Shift-A).
The arrange track appears at the top of the timeline, below the beat ruler.
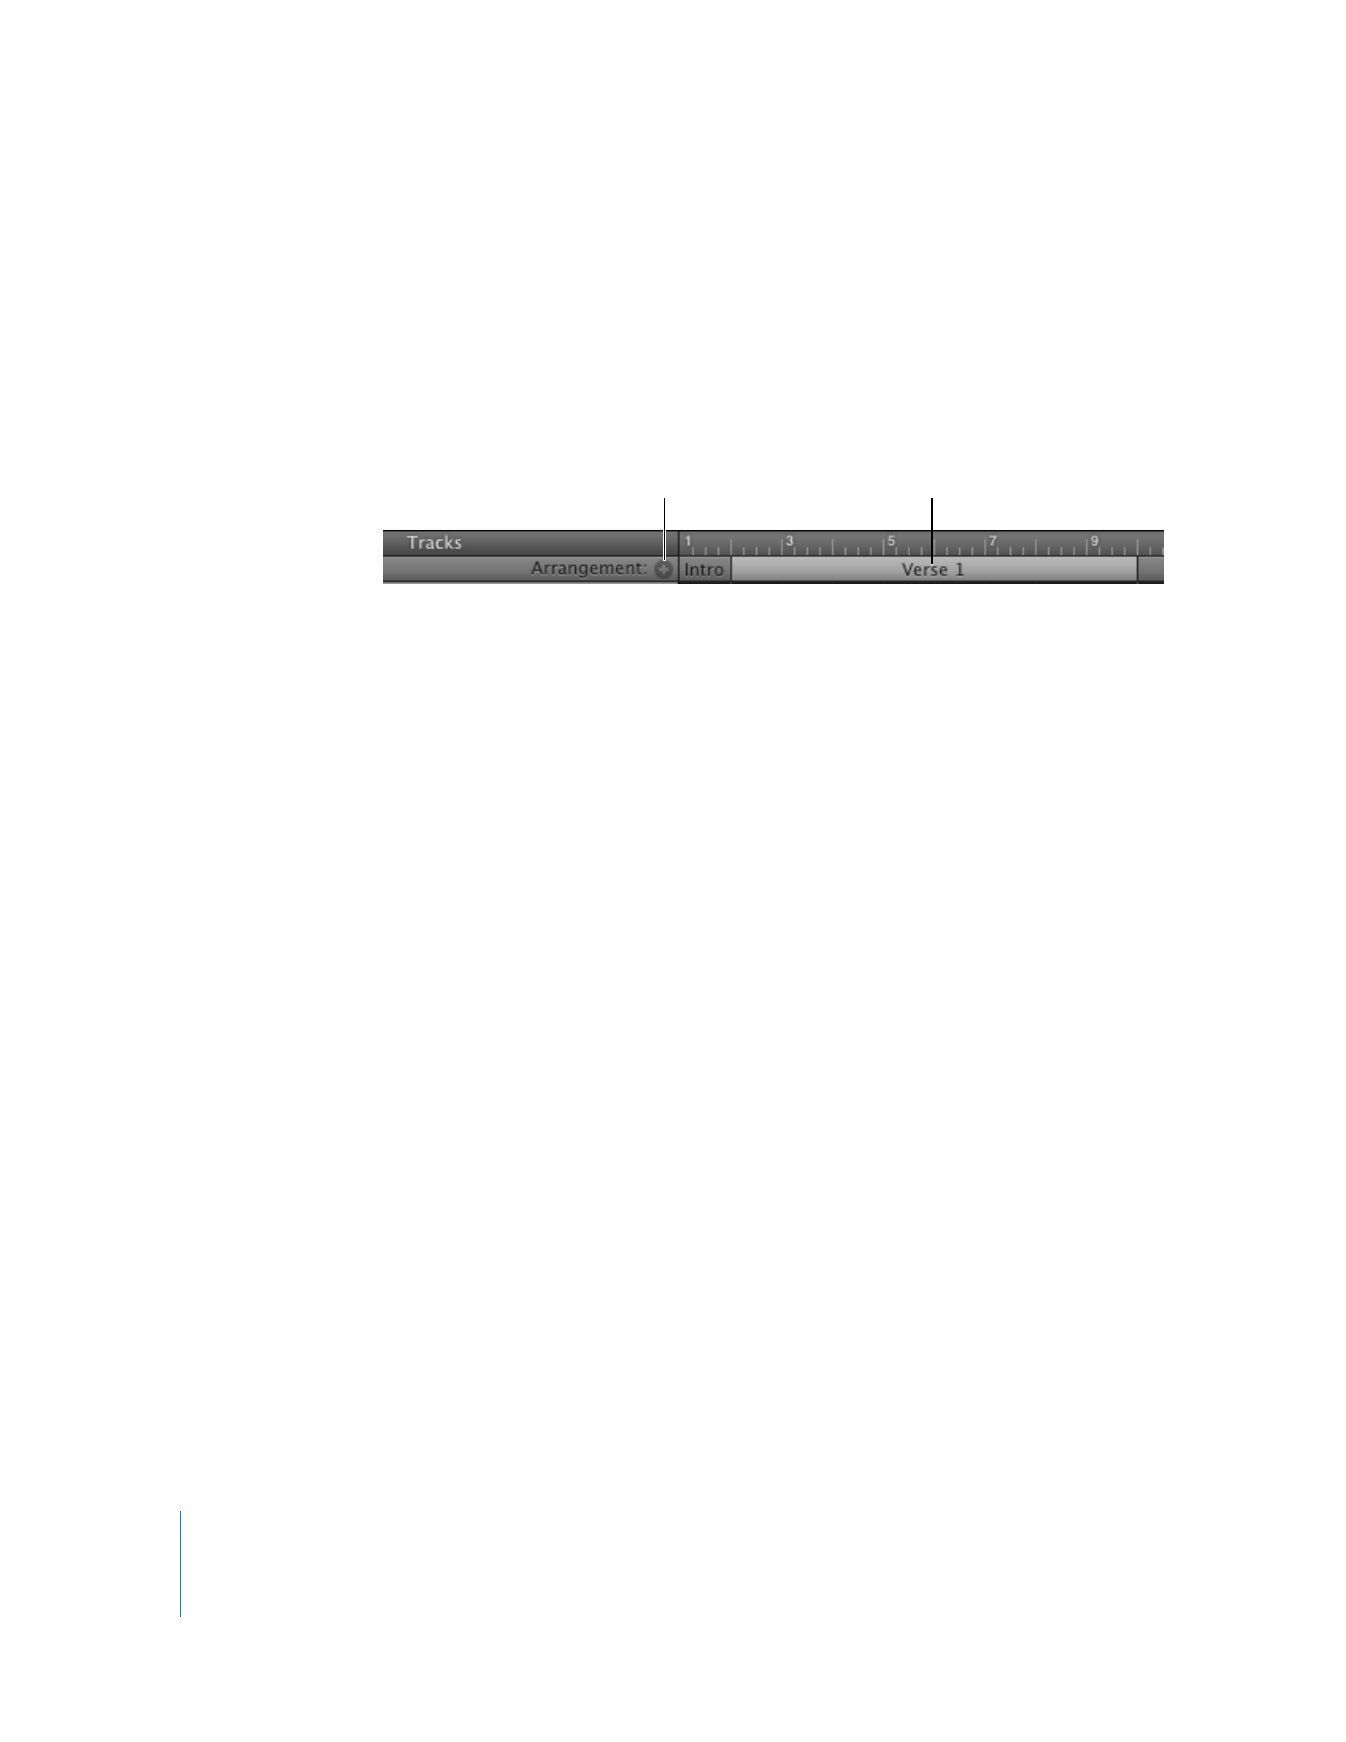
To add an arrange region:
m
Click the small plus sign (+) in the track header area of the arrange track.
When you add an arrange region, it is four measures long and is named “untitled”.
To name an arrange region:
m
Click the name of the region, wait a moment, then type a name.
To select an arrange region:
m
Click the arrange region.
You can select multiple adjacent arrange regions by Shift-clicking them, but you cannot
select arrange regions that are not adjacent. You can select all arrange regions by
clicking the track header area of the arrange track.
When you select an arrange region, it appears light blue, and the section of the project
defined by it is highlighted.
To resize an arrange region:
m
Drag the right edge of the region until it is the size you want.
Resizing an arrange region does not affect the music in the timeline.
To move an arrange region:
m
Drag it to a different part of the arrange track.
To copy an arrange region:
m
Hold down the Option key as you drag the arrange region.
If you move or copy an arrange region between two existing arrange regions, the
region is inserted between the two existing regions. The region later in time moves
(along with all its material) to the point in time where the inserted region ends. This
lets you quickly repeat similar sections, such as multiple verses of a song.
If you move or copy an arrange region to a part of the project that is not empty,
arrange regions to the right move right to make room for the region.
If you move or copy an arrange region to an empty part of the timeline, an
empty arrange region is created between the last existing arrange region and the
one you drag.
Click here to add
an arrange region.
Click here to rename
the arrange region.

Chapter 8
Tutorial 6: Arranging and Editing Your Music
87
If you move or copy an arrange region so that the region moves past the end-of-
project marker in the beat ruler, the marker moves to accommodate the region.
To split an arrange region:
1
Move the playhead to the point where you want to split the arrange region.
2
Choose Edit > Split (or press Command-T).
To join arrange regions:
1
Make sure the arrange regions are adjacent.
2
Choose Edit > Join (or press Command-J).
You can exchange two arrange regions, which exchanges all their material in the
timeline. You can also replace all or part of one arrange region with another one.
To exchange two arrange regions:
m
Drag one of the arrange regions over the other in the arrange track.
To replace one arrange region with another:
m
Hold down the Command key as you drag one arrange region over the other.
When you replace one arrange region with another in this way, the part of the region
from the left edge of the region you drag is replaced.
Editing Your Recordings in the Editor
In addition to working with regions in the timeline, you can edit regions in the editor.
The editor is like a microscope that gives you a close-up view of each region. You can
rename and transpose regions, enhance the timing of regions, enhance the tuning of
Real Instrument regions, and set whether Real Instrument regions keep their original
tempo or follow the project tempo. To make advanced edits like these, you must first
show the editor below the timeline.
To show the editor:
m
Click the Editor button (with scissors cutting a soundwave).
88
Chapter 8
Tutorial 6: Arranging and Editing Your Music
Renaming Regions
You can rename a region in the editor. Naming a region can help you remember when
you recorded it, where in the project it belongs, or what feeling you want it to have.
To rename a region:
1
Double-click the region in the timeline to open it in the editor.
The content of the region appears in the editor. For Real Instrument regions, an audio
waveform appears. For Software Instrument regions, the piano roll display shows the
notes in the region.
2
Double-click the name at the top of the region, then type a new name.
Transposing Regions
When you add a region to the timeline, the region is matched, or transposed, to the key
of the project. In most situations, you’ll want regions to be in the same key as the
project. You can transpose a region to a different key when you want the project to
temporarily move to a new key, or to create tension between the region and the rest of
the project (called dissonance).
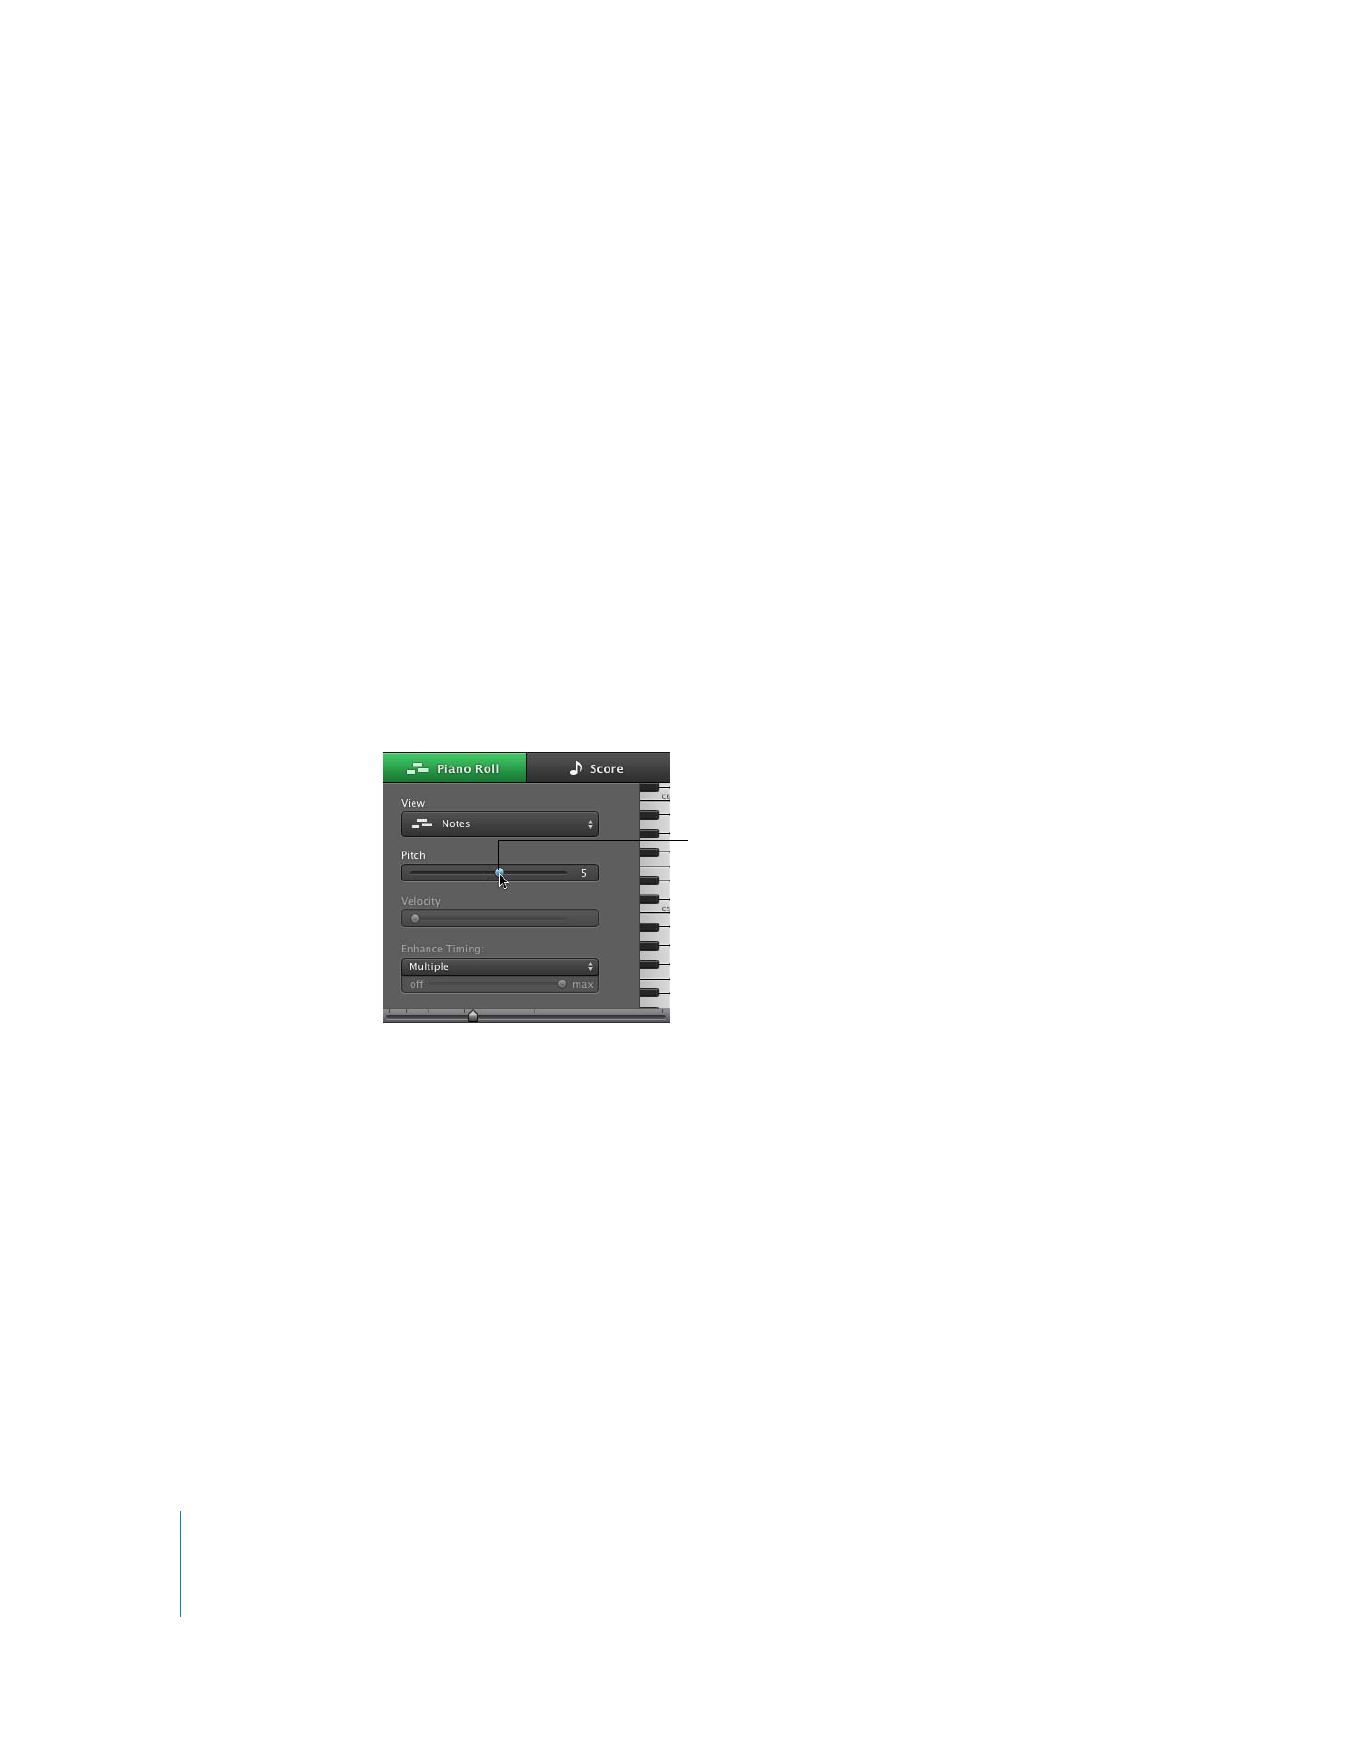
To transpose a region:
1
Select the region in the timeline.
2
Drag the Pitch slider to transpose the region higher or lower.
A semitone is the smallest distance between two musical notes.
Try adding a new bass loop after the one that you already dragged to the timeline, and
then transposing it. The most common transpositions are five and seven semitones up
or down, but feel free to try whatever sounds good.
Drag the Pitch slider,
or type the number of
semitones in the field.

Chapter 8
Tutorial 6: Arranging and Editing Your Music
89
Enhancing the Timing of a Real Instrument Track
You can enhance the timing of the regions in a Real Instrument track. This is especially
useful with regions that contain the right notes but that are not perfectly in time with
the project’s rhythm.
When you enhance timing, all regions in the selected track (both your own recordings
and loops) are enhanced. You can enhance the timing of regions with drums, single-
note instruments, and chordal instruments.
To enhance the timing of a Real Instrument track:
1
In the timeline, double-click the track with the regions you want to enhance to open it
in the editor.
2
In the editor, drag the Enhance Timing slider to the right to increase the effect of
timing enhancement, or drag it left to decrease the effect of enhancement.
3
From the pop-up menu above the Enhance Timing slider, choose the note value to use
as the basis for timing enhancement.
Enhanced timing can cause a delay under certain conditions. For example, moving the
slider while the project is playing can result in a slight delay as playback “catches up” to
the new setting. Also, if enhanced timing is active on a track when you’re recording,
there may be a short delay between when you play and when you hear the sound.
Move the slider to the left to deactivate enhanced timing while recording, and then set
the level of enhanced timing when you finish recording.
The Enhance Timing slider may not work equally well with all musical material,
especially when set to higher values. Listen carefully to the results of using the slider
and set it to the value that sounds best.
If you want timing enhancement to be less than full strength, drag the Enhance Timing
slider to the left to set the amount of enhancement. If you don’t like the results after
you enhance the timing, drag the Enhance Timing slider to “off” to return the selected
items to their original timing.
Enhancing the Timing of a Software Instrument Track
You can enhance the timing of items in a Software Instrument track. You can enhance
the timing of all regions in the track, individual selected regions, or individual notes
in a region.
By setting the “Auto Align to” slider and choosing an Enhanced Timing note value
before recording regions or notes, you can have GarageBand enhance the timing of the
region be enhanced for you as you record.

90
Chapter 8
Tutorial 6: Arranging and Editing Your Music
To enhance the timing of a Software Instrument track:
1
Double-click the header of the Software Instrument track to open it in the editor.
2
To enhance regions, select the regions in the track you want to enhance. To enhance
individual notes, select them in the editor.
3
From the Enhance Timing pop-up menu, choose the note value you want to use to
enhance the timing of the selected items.
If you want timing enhancement to be less than full strength, drag the Enhance Timing
slider to the left to set the amount of enhancement. If you don’t like the results after
you enhance the timing, drag the Enhance Timing slider to “off” to return the selected
items to their original timing.
Enhancing the Tuning of a Real Instrument Track
You can enhance the tuning of regions in a Real Instrument track. This is especially
useful when you record Real Instrument regions that have the right “feel” and timing
but that are not perfectly in tune.
When you enhance a track's tuning, all regions on the selected track (both your own
recordings and loops) are enhanced. Enhancing the tuning can produce accurate
results only on single-note (monophonic) Real Instrument regions, so be sure the track
does not include regions with chords or unpitched sounds.
By default, the Enhance Tuning slider enhances the tuning of notes by moving them
to the closest note on the chromatic (12-note) scale. You can limit the enhancement to
the notes of the project’s key (as chosen in the Track Info pane for the master track)
by selecting the “Limit to key” checkbox.
To enhance the tuning of a Real Instrument track:
1
In the timeline, double-click the Real Instrument track you want to enhance to open it
in the editor.
2
Drag the Enhance Tuning slider to the right to increase the amount of tuning
enhancement, or drag it left to decrease the amount of enhancement.
3
To limit tuning enhancement to the chromatic scale, rather than the project’s key,
deselect the “Limit to key” checkbox below the slider.
You hear the results immediately as the project plays.
Setting the Enhance Tuning slider to higher values can sometimes lead to undesirable
results. Listen carefully to the results of using the slider, and set it to the value that
sounds best.

Chapter 8
Tutorial 6: Arranging and Editing Your Music
91
Setting Real Instrument Regions to Keep Their Original
Tempo and Pitch
By default, Real Instrument recordings (purple) and Real Instrument loops (blue) in the
timeline follow the project tempo and key. You can set a Real Instrument region to
keep its original tempo and pitch instead.
To set a Real Instrument region to follow its original tempo and pitch:
1
In the timeline, select the Real Instrument region.
2
Open the editor.
3
Deselect the Follow Tempo & Pitch checkbox.
If you decide you want the region to follow the project tempo and key, select the
region, then select the Follow Tempo & Pitch checkbox.
The Follow Tempo & Pitch checkbox is unavailable when an audio file (orange),
a Real Instrument loop tagged as a “one-shot,” or a Software Instrument region (green)
is selected. You can convert a Software Instrument loop to a Real Instrument loop
when you add it to the timeline, and then set the Real Instrument loop to keep its
original tempo.
Importing Audio and MIDI Files
You can also add audio files in any of the following formats to your project from the
Finder: AIFF, WAV, AAC (except protected AAC files), Apple Lossless, or MP3. When you
add a compressed file to a project (such as an AAC or MP3 file), it stays compressed,
saving space and time.
To import an audio file:
m
Drag the audio file from the Finder to the timeline, either to a Real Instrument track or
to the empty area below the existing tracks.
If you drag an audio file to the empty area below the existing tracks, a new basic track
is added to the timeline, and the audio file is placed in the new track.
You can also import MIDI (short for Musical Instrument Digital Interface) files into a
project, and use them in Software Instrument tracks.
To import a MIDI file:
m
Drag the MIDI file from the Finder to the timeline, either to a Software Instrument track
or to the empty area below the existing tracks.
When you drag a MIDI file to the empty area of the timeline, a new Software
Instrument track is added to the timeline, and the audio file is placed in the new track.

9
92
9