
Tutorial 1: Creating and Playing
GarageBand Projects
You can create GarageBand projects for songs, podcasts,
ringtones, and more. You can play projects to hear you
music, and save them in several ways.
In this tutorial, you’ll learn how to:
 Create a new project from a template
 Choose project settings for tempo, key, and time signature
 Play the project
 Save the project
Creating a New Project
You start working in GarageBand by creating a project. Projects are where you record,
arrange, and mix your music. When you open the New Project dialog, you can select a
template for the type of project you want to create.
You can choose from several different types of projects, including:
 Music projects for voice, acoustic instruments, electric guitar, loops, and more
 Podcast projects for enhanced audio and video podcast episodes
 Magic GarageBand projects, in which you choose the genre and GarageBand
chooses the instruments and creates an arrangement
 iPhone ringtone projects that you can send to iTunes and use on your iPhone.
In addition to creating new projects, you can open and download Learn to Play lessons
in the New Project dialog. To learn how to use Learn to Play lessons, see “Tutorial 2:
Learning to Play Guitar and Piano” on page 40.
30
Chapter 3
Tutorial 1: Creating and Playing GarageBand Projects
To create a new music project:
1
Choose File > New.
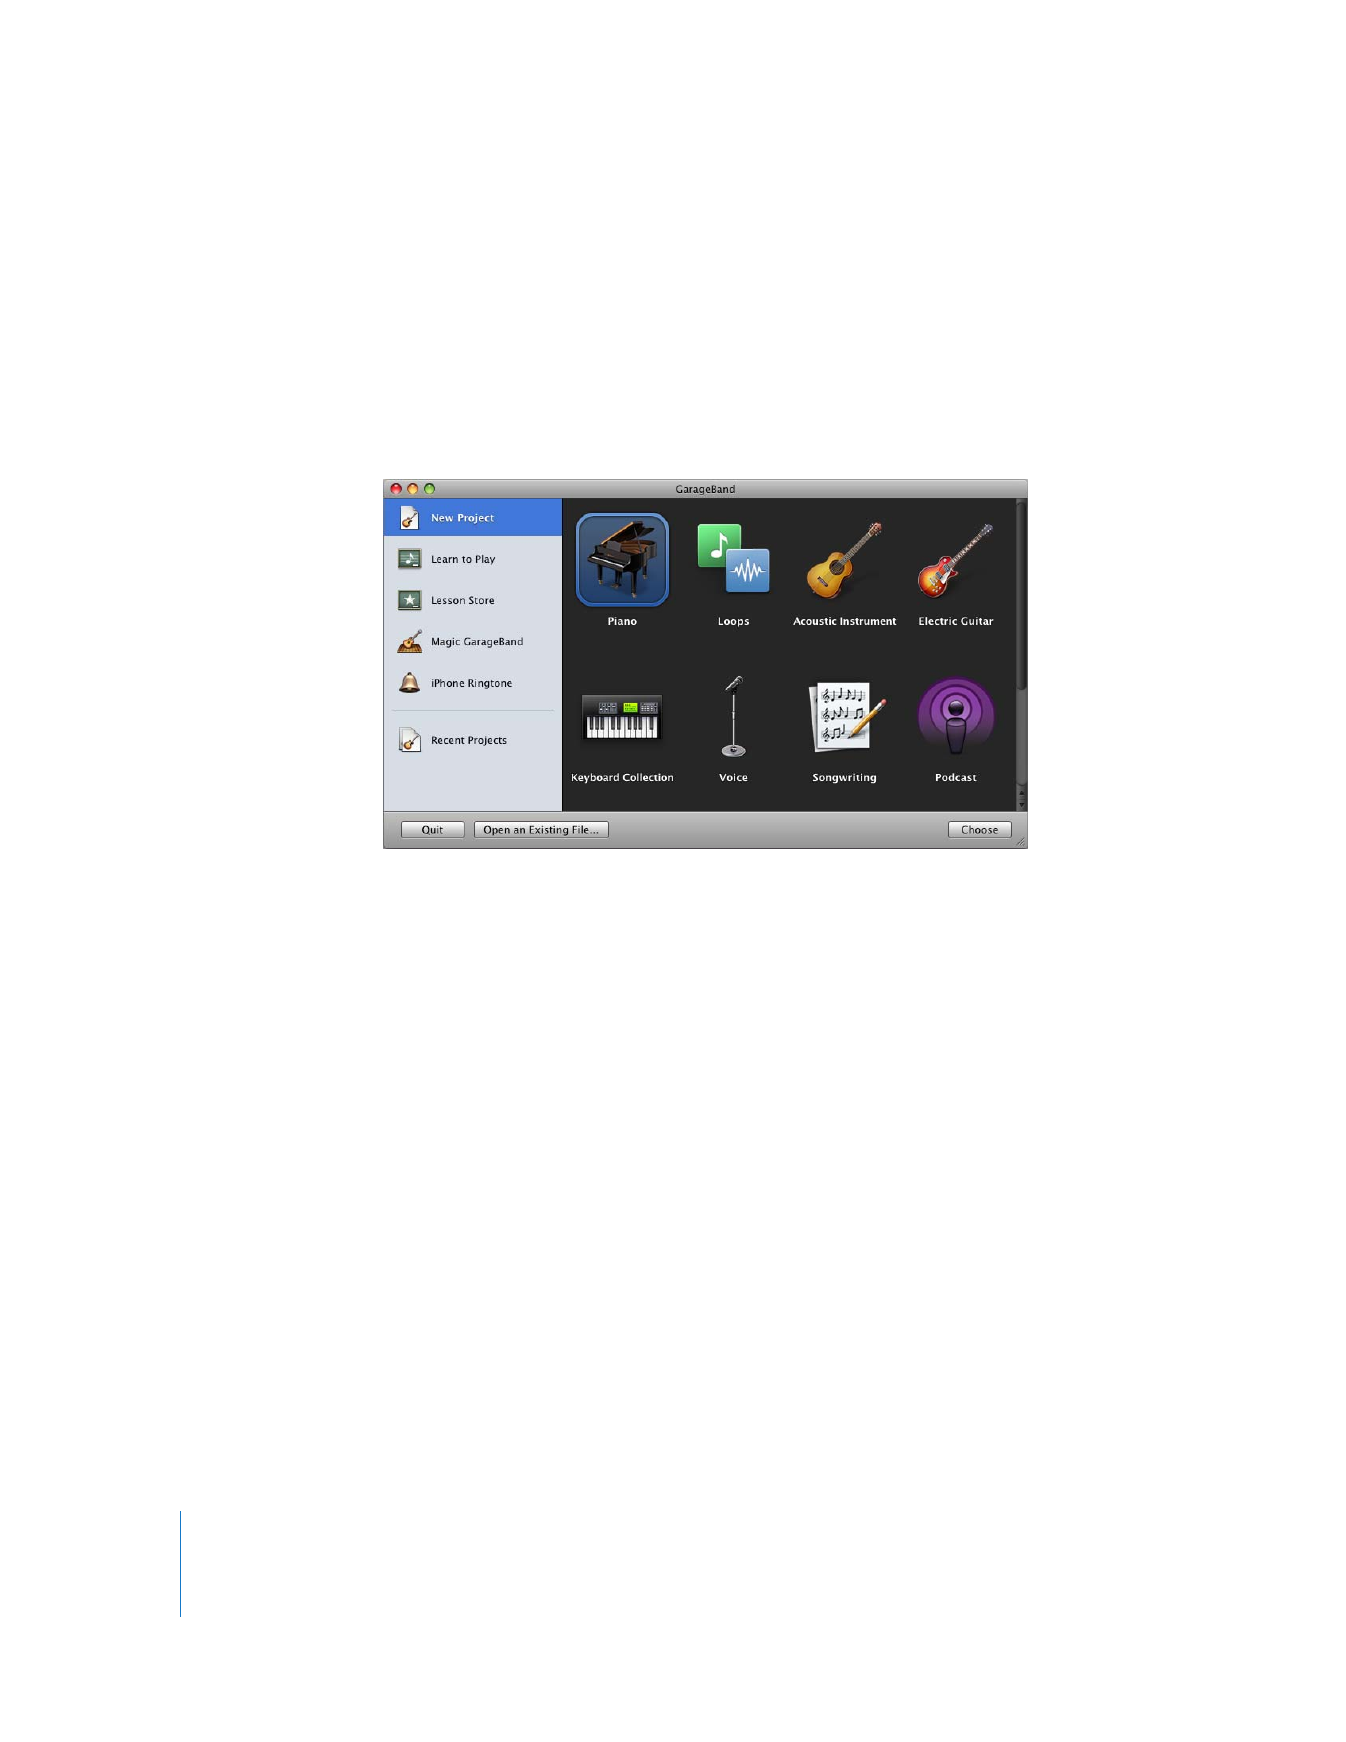
The New Project dialog appears, with buttons for different project types, including New
Project, Magic GarageBand, and iPhone Ringtone. Click the New Project button.
Project templates appear in the main area of the window. Templates are included for
voice, acoustic instrument, electric guitar, keyboard, songwriting, loops, and podcast
episode.
2
Click the icon for the template you want to use, then click Choose.
3
In the Save As dialog, type a name for the project in the Save As field, then browse to
the location where you want to save the project.
4
Click Save.
After a moment, the GarageBand window opens with the new project. The central area
of the GarageBand window is the timeline, which is divided into horizontal rows called
tracks. You organize your recordings and loops in tracks. The left area shows the track
headers, where you can adjust volume, pan position, and other settings for each track.
Below the timeline is the control bar, with buttons to show different editors and
inspectors, a set of transport controls you use to play your projects, and the LCD, where
you can change project settings and change the units of time in the beat ruler. For
more information about the controls in the GarageBand window, see “GarageBand at a
Glance” on page 9.
You can make music in GarageBand in the following ways:
 By recording sound from a microphone connected to your computer
 By recording sound from an electric guitar connected to your computer
 By connecting a USB (or MIDI) keyboard and playing the Software Instruments built
into GarageBand
Chapter 3
Tutorial 1: Creating and Playing GarageBand Projects
31
 By adding and arranging Apple Loops in the timeline
 By creating a Magic GarageBand project
 By viewing and playing along with a Learn to Play lesson
Playing a Project
After you’ve added some recordings, loops, or audio files to your project, you’ll want to
play the project to hear how it sounds. You play projects using either the Space bar on
your computer keyboard or the transport controls, which are located in the control bar
below the timeline.
To start or stop playback:
Press the Space bar, or press the Play button in the center of the transport controls.
Using the Transport Controls
Using the transport controls, you can control playback and move the playhead to
different parts of the project. They also include controls for recording and for turning
on the cycle region.
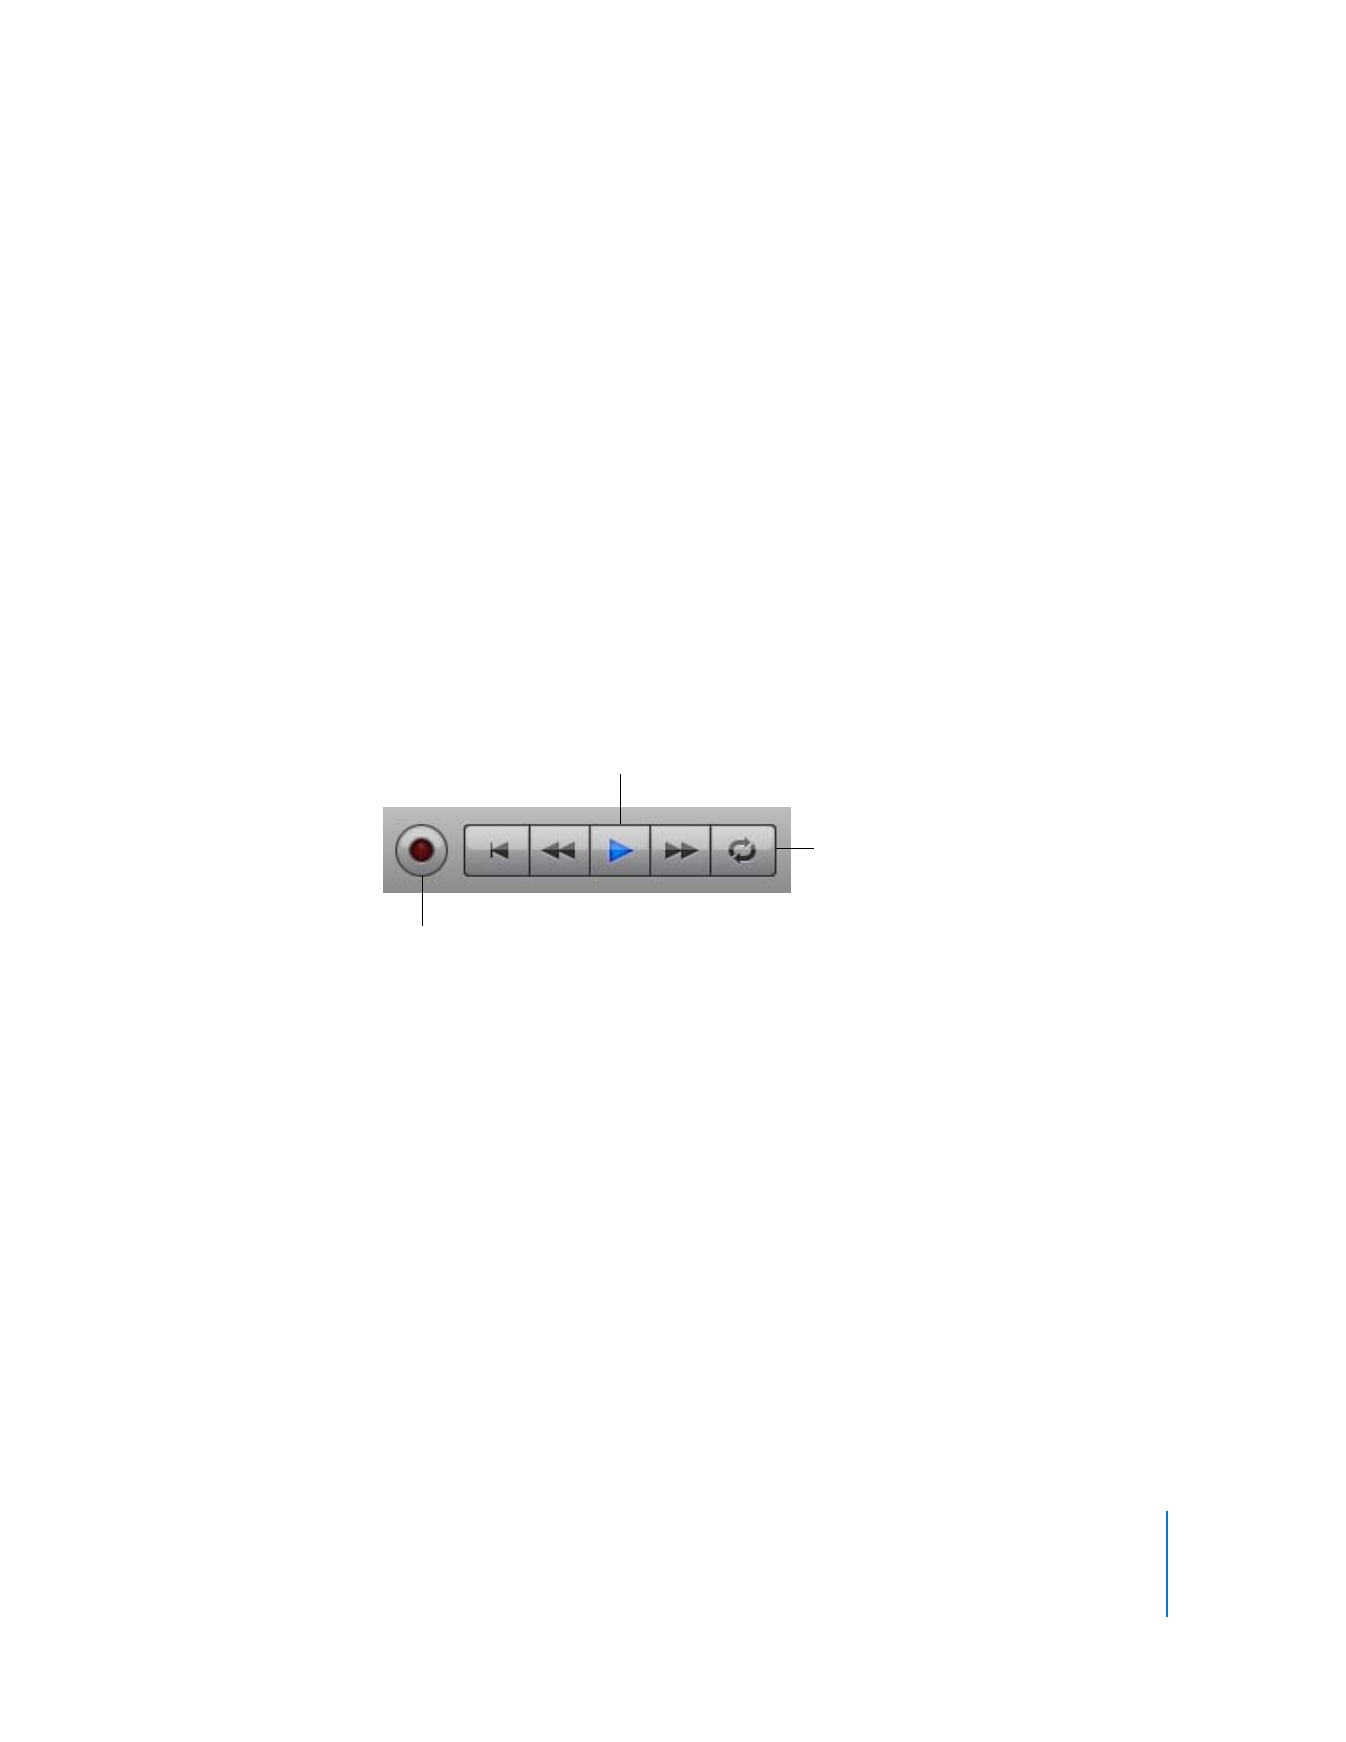
The transport controls are similar to the playback controls used on hardware music
players. They include, from left to right:
 Record: Starts recording on tracks that are enabled for recording
 Go to beginning: Moves the playhead to the beginning of the project
 Back (Rewind): Moves the playhead back one measure
 Play/Pause: Starts the project playing, or stops playback
 Forward: Moves the playhead forward one measure
 Cycle: Turns the cycle region on or off
Play button
Cycle button
Record button

32
Chapter 3
Tutorial 1: Creating and Playing GarageBand Projects
Moving the Playhead
The playhead is a vertical line extending through the timeline that shows the part of
the project currently playing, or the place where playback starts when you click the
Play button. The triangle at the top of the playhead shows its current position in the
beat ruler. The beat ruler marks the units of time in the project, either in beats and
measures (musical time) or minutes and seconds. You can move the playhead to any
point in time, either when the project is stopped or while it is playing.
To move the playhead:
m
Drag the triangle at the top of the playhead to the place in the beat ruler when you
want playback to start.
Using the LCD
The LCD (liquid crystal display), located in the control bar next to the transport controls,
shows the playhead position as the project plays. You can change the units of time
shown in the LCD, and move the playhead.
Changing the Units of Time
The LCD and the beat ruler can display either beats and measures (musical time) or
minutes and seconds. You can use musical time when you’re arranging a song to align
recordings, loops, and other items in the timeline with the rhythm of the song, and use
minutes and seconds when you’re working with podcast or movie projects.
To show beats and measures in the LCD:
m
Click the icon on the left side of the LCD and choose Measures.
To show minutes and seconds in the LCD:
m
Click the icon on the left side of the LCD and choose Time.
When you change the units of time in the LCD, the beat ruler also changes to show the
same units of time.
Changing the Playhead Position in the LCD
You can move the playhead by changing the time shown in the LCD in either Measures
or Time mode.
To change the time in the LCD, do one of the following:
 Drag one of the numerals up or down.
 Double-click one of the numbers, type a new number, then press Return.

Chapter 3
Tutorial 1: Creating and Playing GarageBand Projects
33
Changing the Project Tempo, Key, and Time Signature
Each GarageBand project includes settings for tempo, key, and time signature. When
you add loops or create recordings in a music project, GarageBand matches them to
the project tempo and key so that they sound good together. You can choose the
project tempo, key, and time signature in the Save As dialog when you create a new
project, or in the LCD while you’re working on the project.
Changing the Tempo
Each project has a speed, or tempo. The tempo defines the rate at which beats, the
basic rhythmic pulse, occur in the project. The tempo is measured in beats per minute,
or bpm. You can set the tempo to any speed between 60 and 240 bpm. The default
tempo is 120 bpm, which is a common tempo used in popular music.
To change the tempo in the LCD:
1
Click the icon on the left side of the LCD and choose Project.
2
Click the number below the word Tempo.
3
Drag the slider up or down to a new tempo.
Setting the Key
Each project has a key, which defines the central note to which the other notes in the
music relate. The key can be any key between A and G-sharp (G#). Along with the key,
you can choose to use either the major or minor scale. In the LCD, major keys are
shown as “maj” and minor keys are shown as “min.”
To change the key in the LCD:
1
Click the icon on the left side of the LCD and choose Project.
2
Click the key, shown below the word Key.
3
Choose a new key from the Key pop-up menu.
4
Optionally, choose a different scale from the bottom of the Key pop-up menu.

34
Chapter 3
Tutorial 1: Creating and Playing GarageBand Projects
Setting the Time Signature
Each project has a time signature, which controls the relationship between beats and
measures. A project’s time signature consists of two numbers separated by a forward
slash, which look similar to a fraction. The number on the left controls the number of
beats in each measure, and the number on the right controls the beat value (the length
of the note that gets one beat).
You can use any of the following time signatures in a GarageBand project: 2/2, 2/4, 3/4,
4/4, 5/4, 7/4, 6/8, 7/8, 9/8, or 12/8. The default is 4/4, the most commonly used time
signature.
To change the project tempo in the LCD:
1
Click the icon on the left side of the LCD and choose Project.
2
Click the number below the word Signature.
3
Choose a new time signature from the Signature pop-up menu.
Saving a Project
Now that you’ve made some changes to your project, it’s time to save your work.
To save a project:
m
Choose File > Save (or press Command-S).
You can also save a project as an archive. When you save a project as an archive, all the
audio files, loops, and other media the project uses are saved in the project file. This is
especially useful if you want to copy the project to another computer, or are
duplicating a project with your own Real Instrument recordings.
To save a project as an archive:
1
Choose File > Save As.
2
In the Save As dialog, select the Save As Archive checkbox.
You can also compact projects to make sharing easier. Compacting a project reduces
the file size by compressing audio in the project. Compacting can result in some loss of
audio quality.
To compact a project:
1
Choose File > Save As.
2
In the Save As dialog, select the Compact Project checkbox.
3
Choose the compression settings you want to use from the pop-up menu next to the
Compact Project checkbox.
Chapter 3
Tutorial 1: Creating and Playing GarageBand Projects
35
When you close a project, by default GarageBand creates an iLife preview for the
project. An iLife preview lets you preview the project in the Media Browser and in other
iLife applications. It can also increase the project’s file size. You can select whether to
create an iLife preview for projects in the General pane of GarageBand preferences.
Creating a Magic GarageBand Project
You can quickly create a Magic GarageBand project. When you create a Magic
GarageBand project, you choose the genre (style) of music, and GarageBand chooses
the instruments and creates a basic arrangement with them. You can change
instruments, mix the song, and play and record your own instrument together with
the song.
To create a Magic GarageBand project:
1
Choose File > New.
2
In the New Project dialog, click Magic GarageBand.
3
Click the genre for the song, then click Choose.
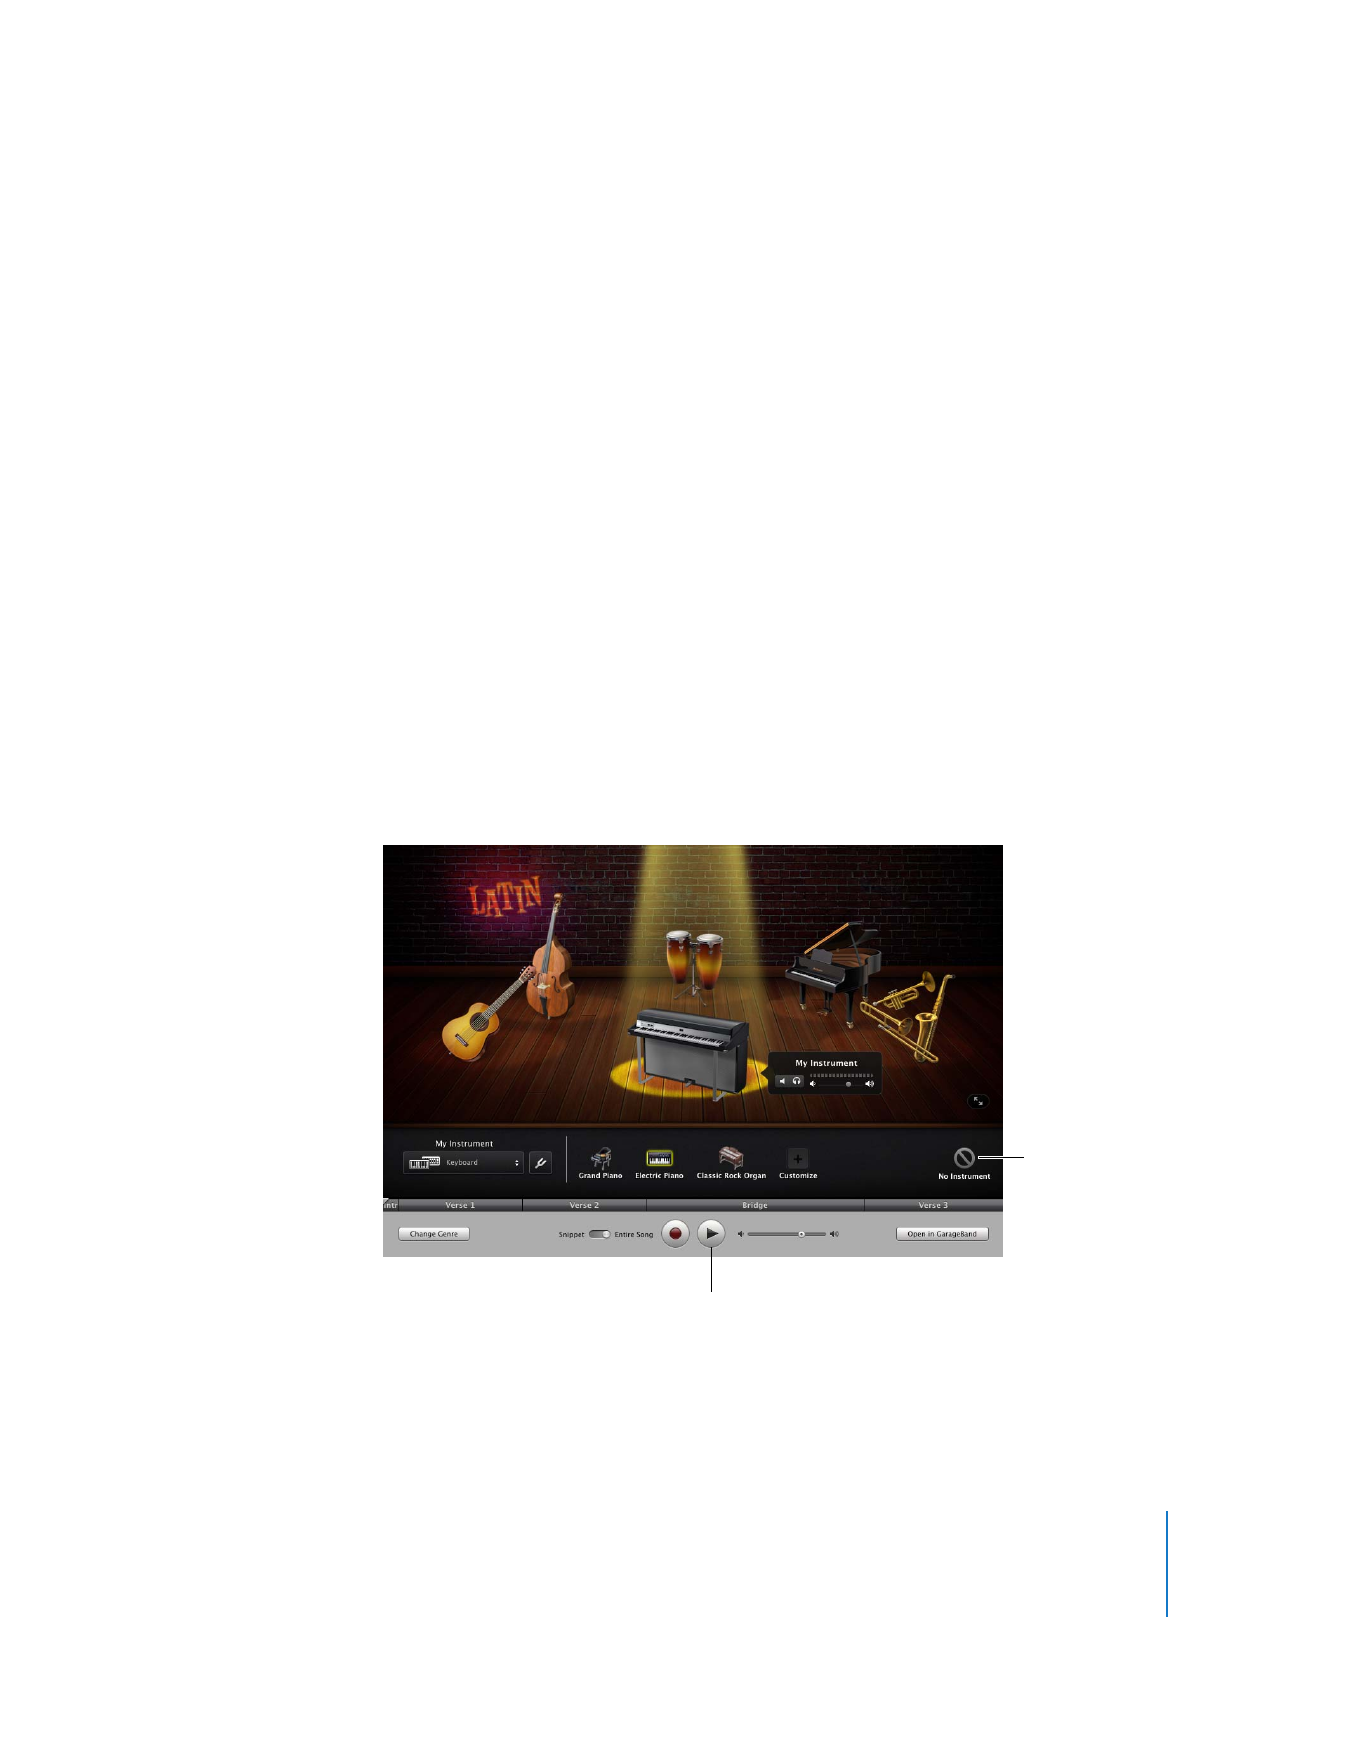
After a moment, the Magic GarageBand stage appears, showing the instruments in the
song. Each Magic GarageBand song includes Guitar, Bass, Drums, Keyboard, and
Melody instruments, and includes a place for My Instrument at the center of the stage.
Click the Play button to
preview the song.
Different choices
appear here when
you click an
instrument.

36
Chapter 3
Tutorial 1: Creating and Playing GarageBand Projects
4
To preview the song, click the Play button.
Magic GarageBand opens in a full-screen view, with the instruments for the project
displayed on the stage, and a control bar with playback and other controls below the
stage. You can change between this view and a window view by clicking the View
button on the lower-right part of the stage.
Choosing Different Instruments in Magic GarageBand
You can choose different instruments for each part of a Magic GarageBand song, or
have GarageBand choose a different set of instruments.
To choose a different instrument:
1
Select one of the instruments on the stage.
Different choices for the instrument appear below the stage.
2
Select a new instrument from below the stage.
3
After you choose the instruments you want, you can click Play again to hear the song
with the new instruments.
Shuffling Instruments in Magic GarageBand
In addition to choosing instruments manually, you can shuffle instruments in a Magic
GarageBand song. When you shuffle instruments, GarageBand chooses a new set of
instruments for the project.
To shuffle instruments:
m
Click the Shuffle Instruments button below the stage.
The Shuffle Instruments button is available when no instrument is selected on
the stage.
Mixing Instruments in Magic GarageBand
You can mix a Magic GarageBand song by adjusting the volume of different
instruments to balance their sound in the overall mix. You can also mute (silence)
instruments and solo them (hear them alone without the rest of the song).
To mix a Magic GarageBand song, you first show the mixer for one of the instruments.
When you select another instrument, the mixer for that instrument appears, until you
close the mixer for the current instrument.
Chapter 3
Tutorial 1: Creating and Playing GarageBand Projects
37
To show the mixer for an instrument:
1
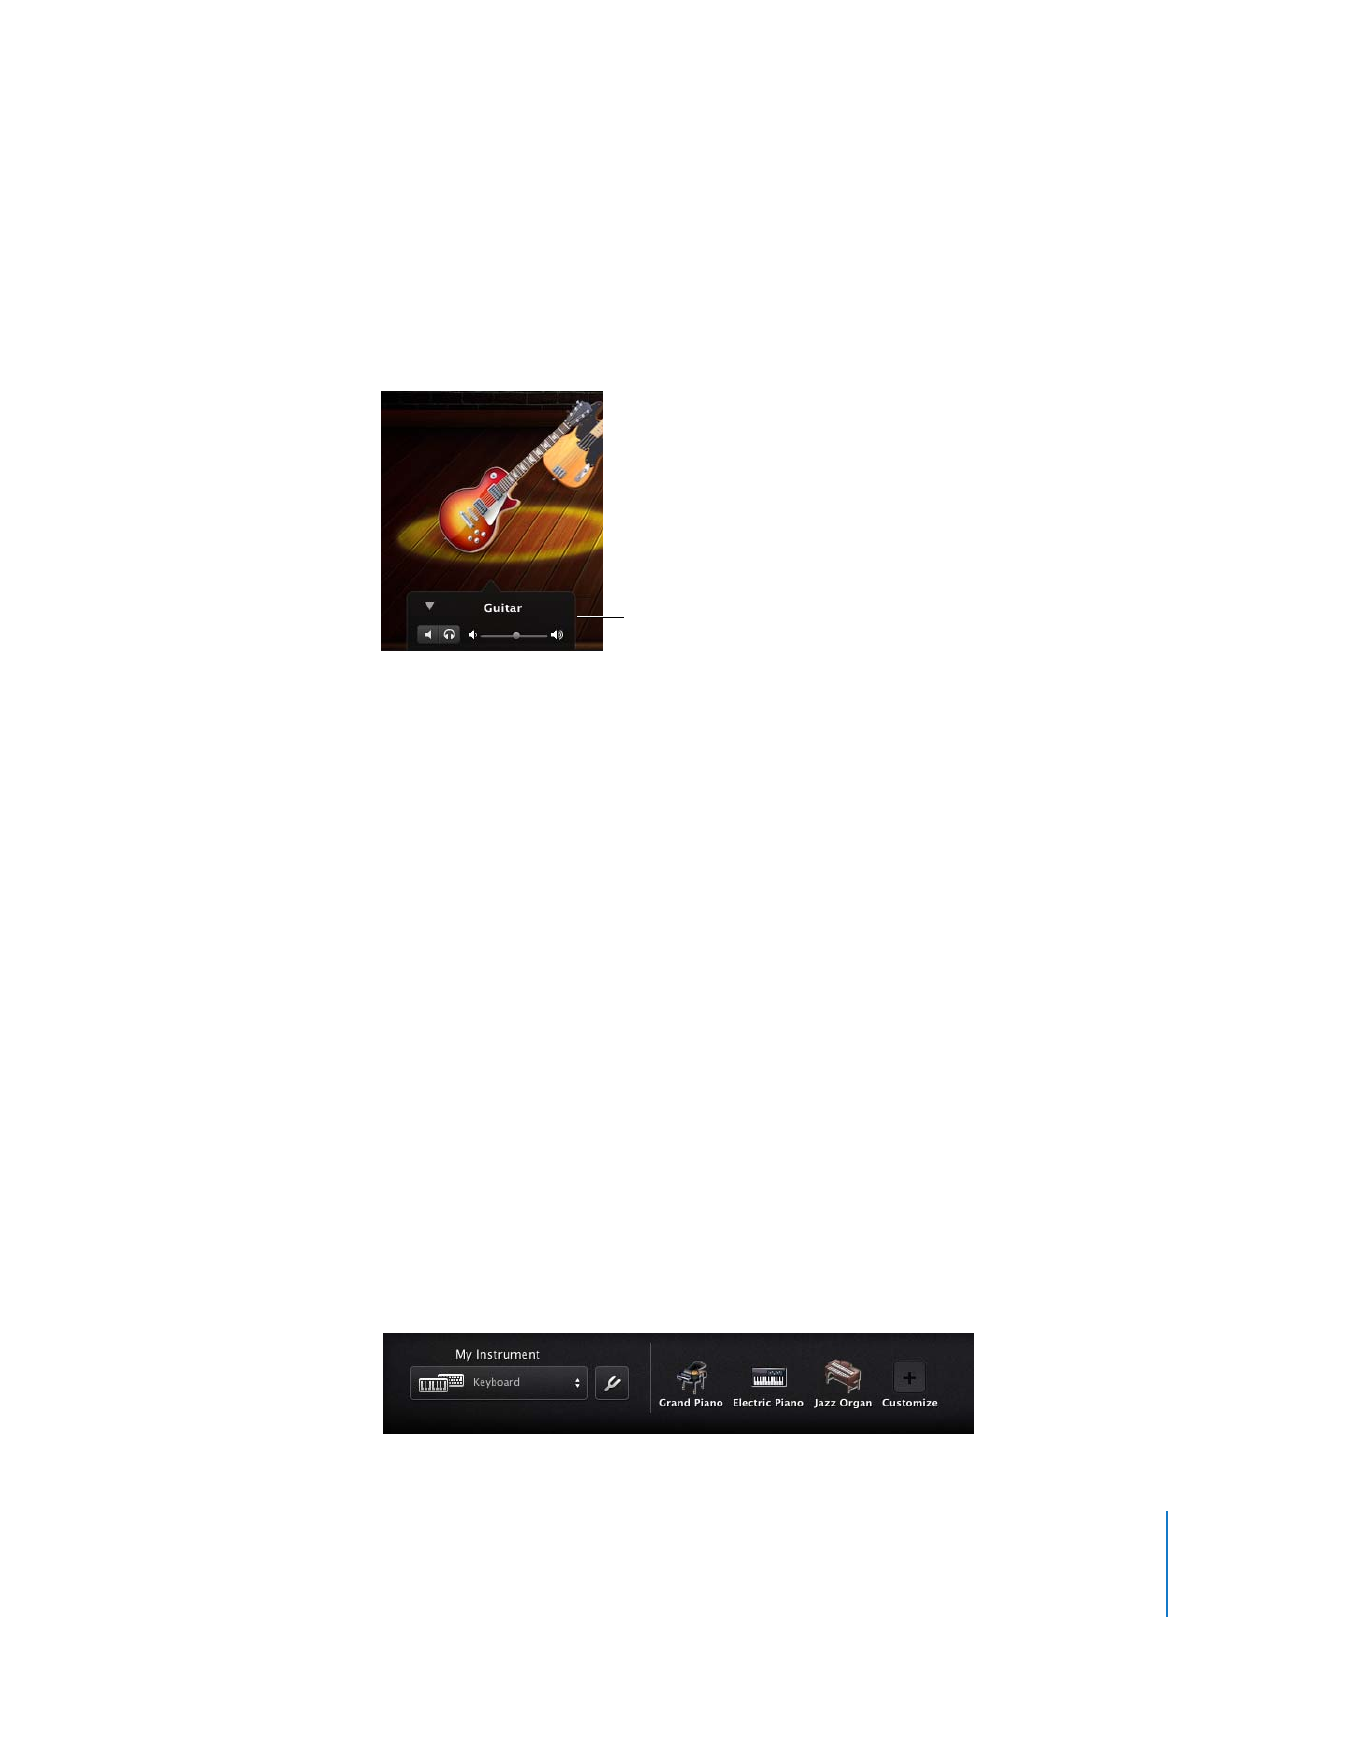
Click an instrument on the stage.
A small window showing the instrument name appears.
2
Click the disclosure triangle to show the mixing controls for the instrument.
To mute an instrument:
m
Click the Mute button in the mixer.
To solo an instrument:
m
Click the Solo button in the mixer.
To adjust the volume of an instrument:
m
Drag the volume slider in the mixer.
Playing and Recording Your Instrument in Magic GarageBand
Every Magic GarageBand project has a place for “My Instrument” at the center of the
stage. You can add your own instrument to sing or play with the project, and record
your instrument together with the project.
Playing My Instrument
To play your instrument together with the Magic GarageBand project, you first select
the instrument to use as My Instrument. You can use either a Real Instrument or a
Software Instrument as My Instrument.
To select the input and instrument for My Instrument:
1
Click the highlighted circle at the front of the stage.
Different instruments for My Instrument appear below the stage, along with the My
Instrument menu and the Tuner button.
Mixing controls

38
Chapter 3
Tutorial 1: Creating and Playing GarageBand Projects
2
Choose the input for the instrument you want to play from the My Instrument pop-up
menu.
 If you’re playing a USB or MIDI music keyboard, choose Keyboard.
 If you’re playing a guitar connected to your computer’s audio input port, choose
Guitar.
 If you’re using your computer’s built-in microphone, choose Internal Mic.
 If you’re using a microphone connected to an audio interface, choose External Mic.
 If you’re playing a guitar connected to an audio interface, choose External Guitar.
3
If you’re using a microphone and are using your computer speakers to hear your
instrument, choose Monitor Off from the My Instrument pop-up menu.
4
Click the instrument you want to use from below the stage.
5
If you want to use an instrument not shown, click Customize. When the Customize
window appears, choose the type of instrument you want to use from the pop-up
menu at the top of the window, then select the instrument you want to use from the
list in the window.
After you choose the input and instrument for My Instrument, you can play your
instrument in the project.
Recording My Instrument
You can record the instrument selected as My Instrument along with the Magic
GarageBand project. When you open the project in GarageBand, your recording will
appear in a new track in the timeline.
To record My Instrument:
1
Make sure your instrument is working properly and is connected to your computer.
2
Click the Record button (the red circle) in the control bar.
After a one-measure count-in, recording starts. A narrow track appears below the
sections, showing the waveform of the new recording.
3
When you’re finished recording, click the Play button.
Chapter 3
Tutorial 1: Creating and Playing GarageBand Projects
39
Tuning Your Guitar in Magic GarageBand
If you’re using a guitar as My Instrument, you can tune the guitar in Magic GarageBand.
To tune your guitar in Magic GarageBand:
1
Make sure that My Instrument is selected on the stage.
2
Click the Tuner button next to the My Instrument pop-up menu.
The tuner appears below the stage.
3
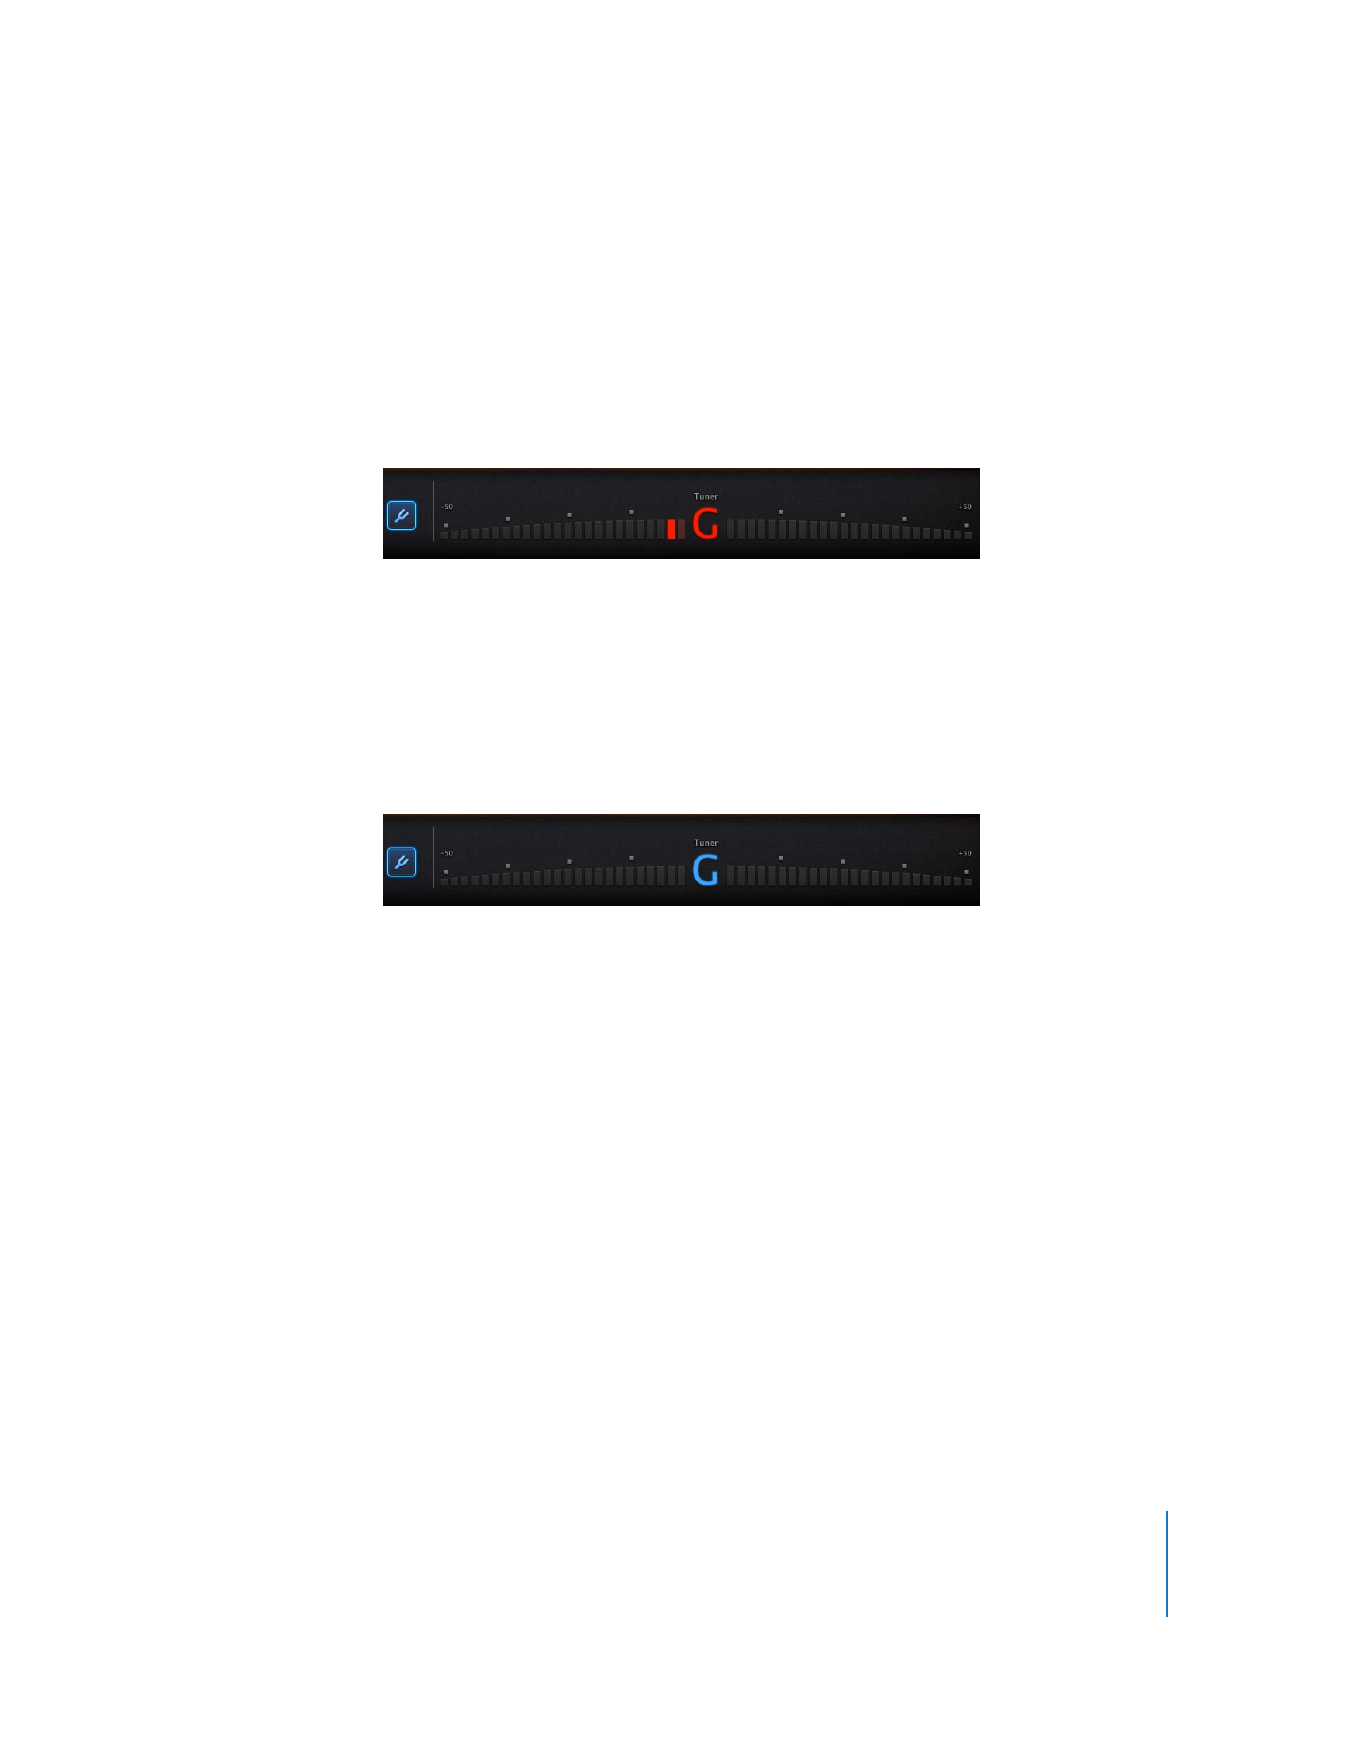
Play a note on your guitar and watch the tuner. Be sure to play only a single note.
The note name appears in the center of the tuner. If the note is out of tune, the note
name appears red, and bars appear on either side of the tuner indicating whether the
note is flat (left side) or sharp (right side).
4
Turn the tuning peg for the string on your guitar, continuing to watch the tuner.
When the note is in tune, the note name appears blue.
5
When you’re finished tuning, click the Tuner button again to dismiss the tuner.

4
40
4